An explanation of how my compiler compiles my own programming into C++.
If you’d like to follow along with the code then you can access it here.
The Grammar
My initial goal was to create a programming language that contained no characters like <, >, ”, (, and other punctuation marks. This meant all these characters had to be replaced with words (making the language verbose and hence the name verbosity).
To start, I created a basic informal grammar for the language shown below:
=========================
        Variables
=========================

let [name] of type [type] be [expression]


=========================
        Functions
=========================

define doSomething with [parameter name] of type [type] gives back [type] as
  give [expression] back
end

call doSomething stop


=========================
       Conditionals
=========================

if [inequality expression] then
  [code]
otherwise if [inequality expression] then
  [code]
otherwise
  [code]
end

=========================
          Loops
=========================

for [identifier name] [inequality expression] repeat
end
With this basic grammar in place, I knew what I wanted the language to look like and I could move onto coding the actual compiler.
The Lexer
To do anything useful with the input code I need to first understand what each word in the input file means.
To do this, I first split up all the tokens based on certain delimiters like spaces and other keywords which signify the end of a statement or the start of a new code block.
With the input file split up into chunks, I could now go through and assign a TokenType to each string. Since I wanted to keep both the TokenType (which is an Enum with all the different types of elements) and string I created the following Token class:
class Token {
public:
  TokenType tokenType;
  std::string tokenString;

  Token(const TokenType tokenType, std::string tokenString) : tokenType(tokenType), tokenString(std::move(tokenString)) {}
};
With this place, I simply looped through all string that was split up and assigned a token type to everything. For instance, if I see the word “let” then I would use the following code to assign a type to it:
token.tokenType = TokenType::LET;Doing this all the different strings then allows the program to easily parse what everything means in the file rather than just seeing if certain strings equal something else which can be very error prone.
Constructing the Abstract Syntax Tree (AST)
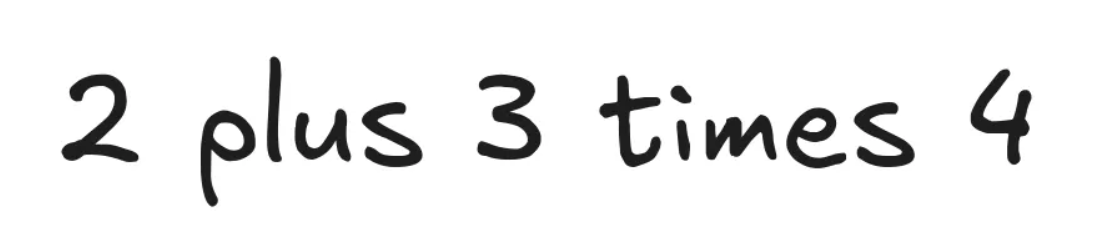
Now, the program knows that certain tokens exist everywhere, but it still can’t make sense of them. For instance, take the following arithmetic expression:
So far the program knows what each part of this expression is:
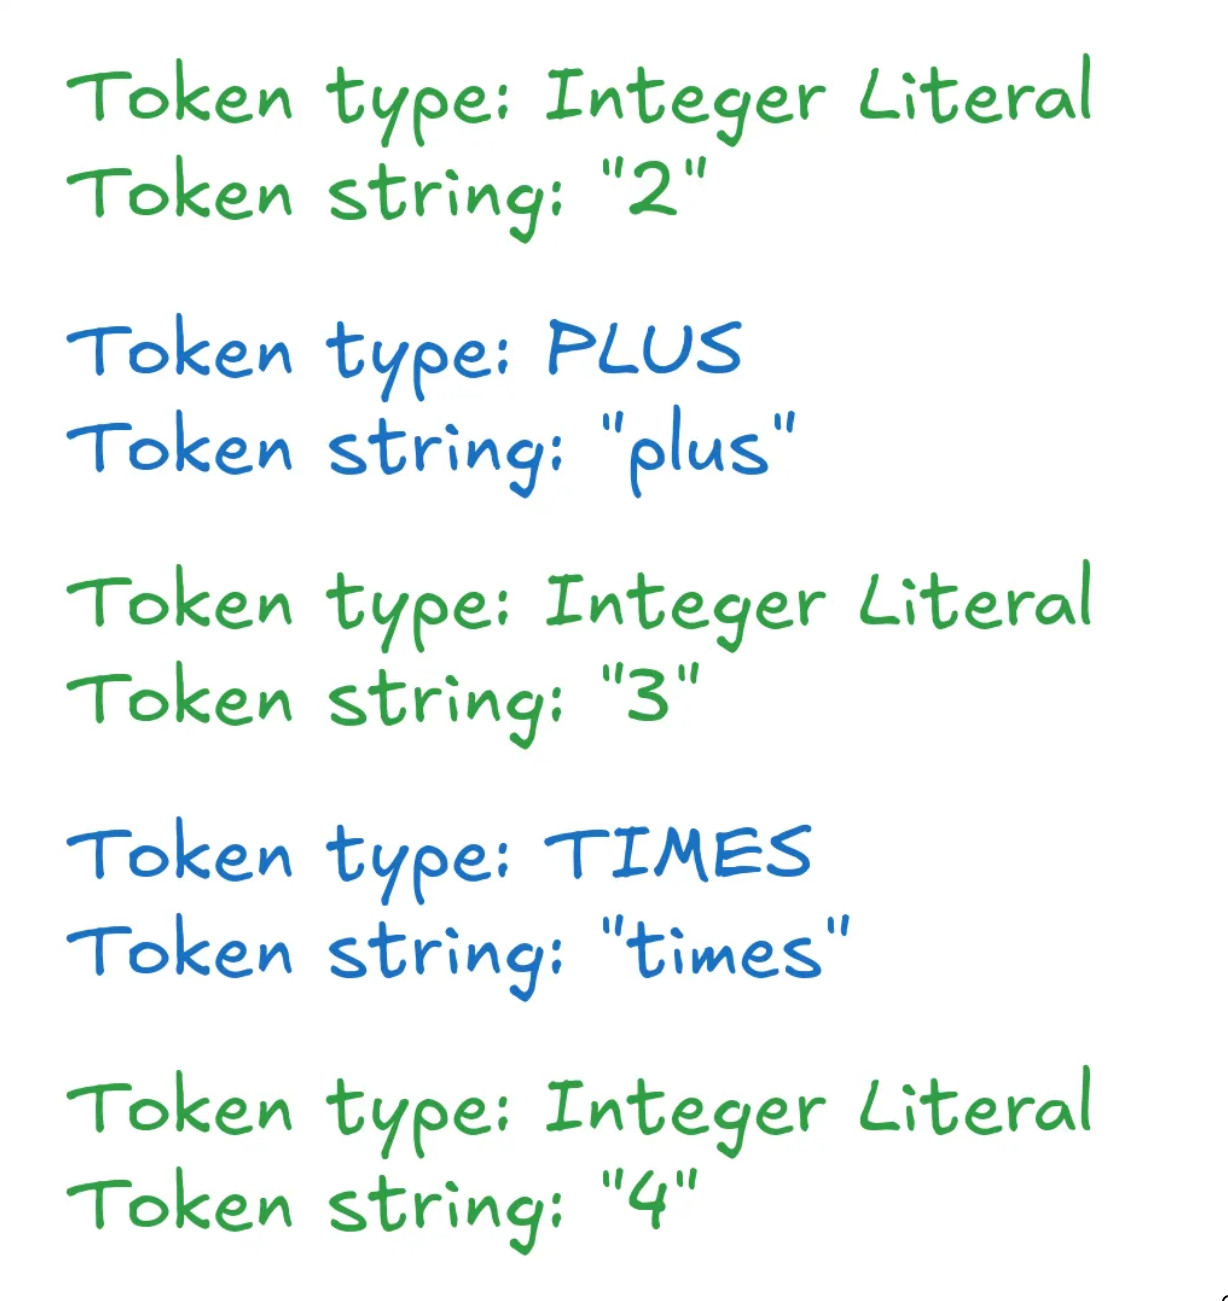
However, it doesn’t know how to make sense of these tokens as there’s no structure to them. They’re just a list of strings and enums.
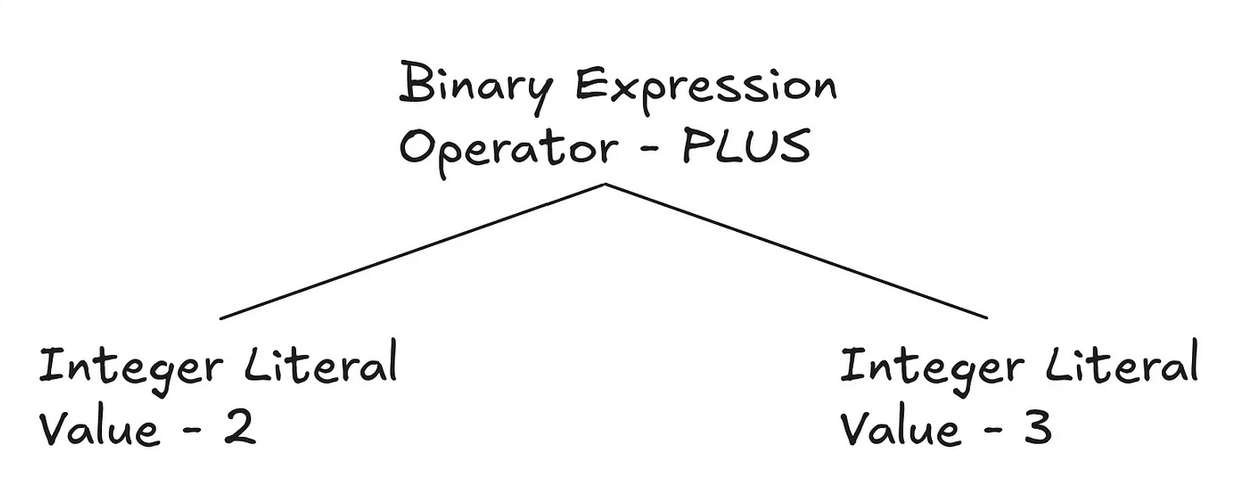
To give these tokens structure, we can create an Abstract Syntax Tree (AST). For an expression like 2 + 3, it could look like the image below:
A great website that shows the ASTs that existing programming languages create is https://astexplorer.net/.
To create this tree, I started by creating a function called constructAST which would be called recursively every time I had to process another code block. Inside this function, I essentially check for the start of variable statements, function statements, if statements, etc.
This is done by simply checking what the current token is. For instance, if the token type is LET then it means it is the start of a variable statement which was defined in the grammar previously.
Let’s say the function finds a function statement as shown below by seeing that there’s a DEFINE keyword:
define doSomething gives back integer as
  let x of type integer be 5 stop
  give x back
end
The first thing it will do is extract the statement using a function called incrementToKeyword . The reason it’s given this name is because I have the function increment to the as keyword as that is the end of the statement and also the start of the actual code block inside the function. This means the code above gets split up as shown below:
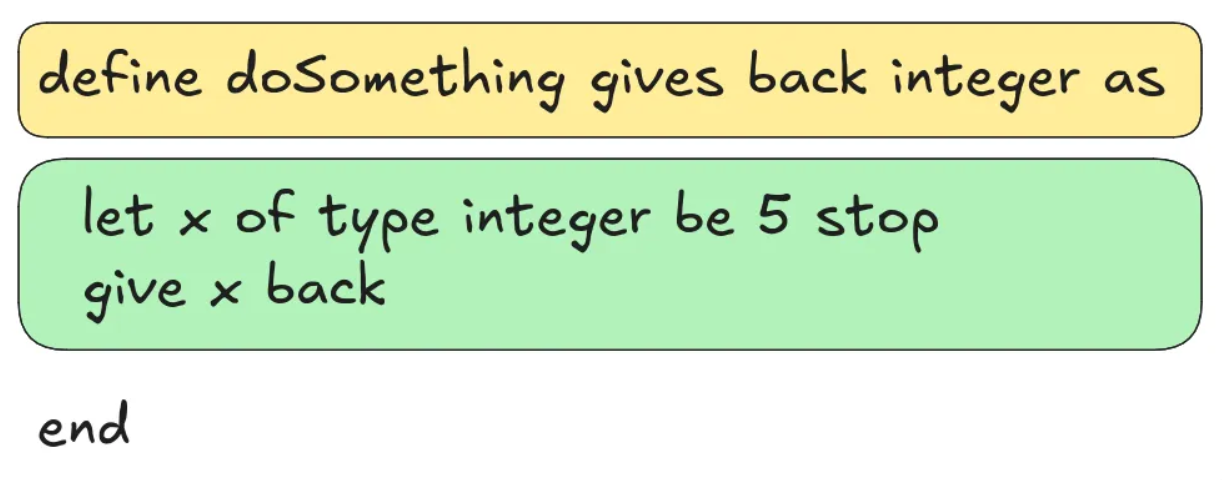
The yellow box represents the statement, and the green box represents the code block. Now, to process the code block, all I have to do is recursively call constructAST and it’ll keep applying the same process and will return nodes for variables, if statements, etc.
This process of extracting the statement, and then processing the code block is essentially repeated for all the different types of statements that could exist like return statements, print statements, variable statements, etc.
Now, the last major part of constructing the AST was dealing with numerical expressions like 5 + 6 / 3. The way I did this was by using a technique called Pratt Parsing from this amazing article. I also added support for inequalities by simply splitting the expression wherever the inequality sign was and evaluating both sides as shown in the code below:
optional<int> inequalityIndex = isInequality(statement);
if (inequalityIndex.has_value()) {
vector<Token> leftArray, rightArray;
// Split the two sides of the inequality into their own arrays
for (int j = 0; j < inequalityIndex.value(); ++j)
leftArray.push_back(statement[j]);
for (int j = inequalityIndex.value() + 1; j < statement.size(); ++j)
rightArray.push_back(statement[j]);
// Parse both sides
int iCopy = i;
variant<TYPES> left = evaluateExpression(leftArray, iCopy, 0);
iCopy = i;
variant<TYPES> right = evaluateExpression(rightArray, iCopy, 0);
return BinaryExpression(statement[inequalityIndex.value()].tokenType, left, right);
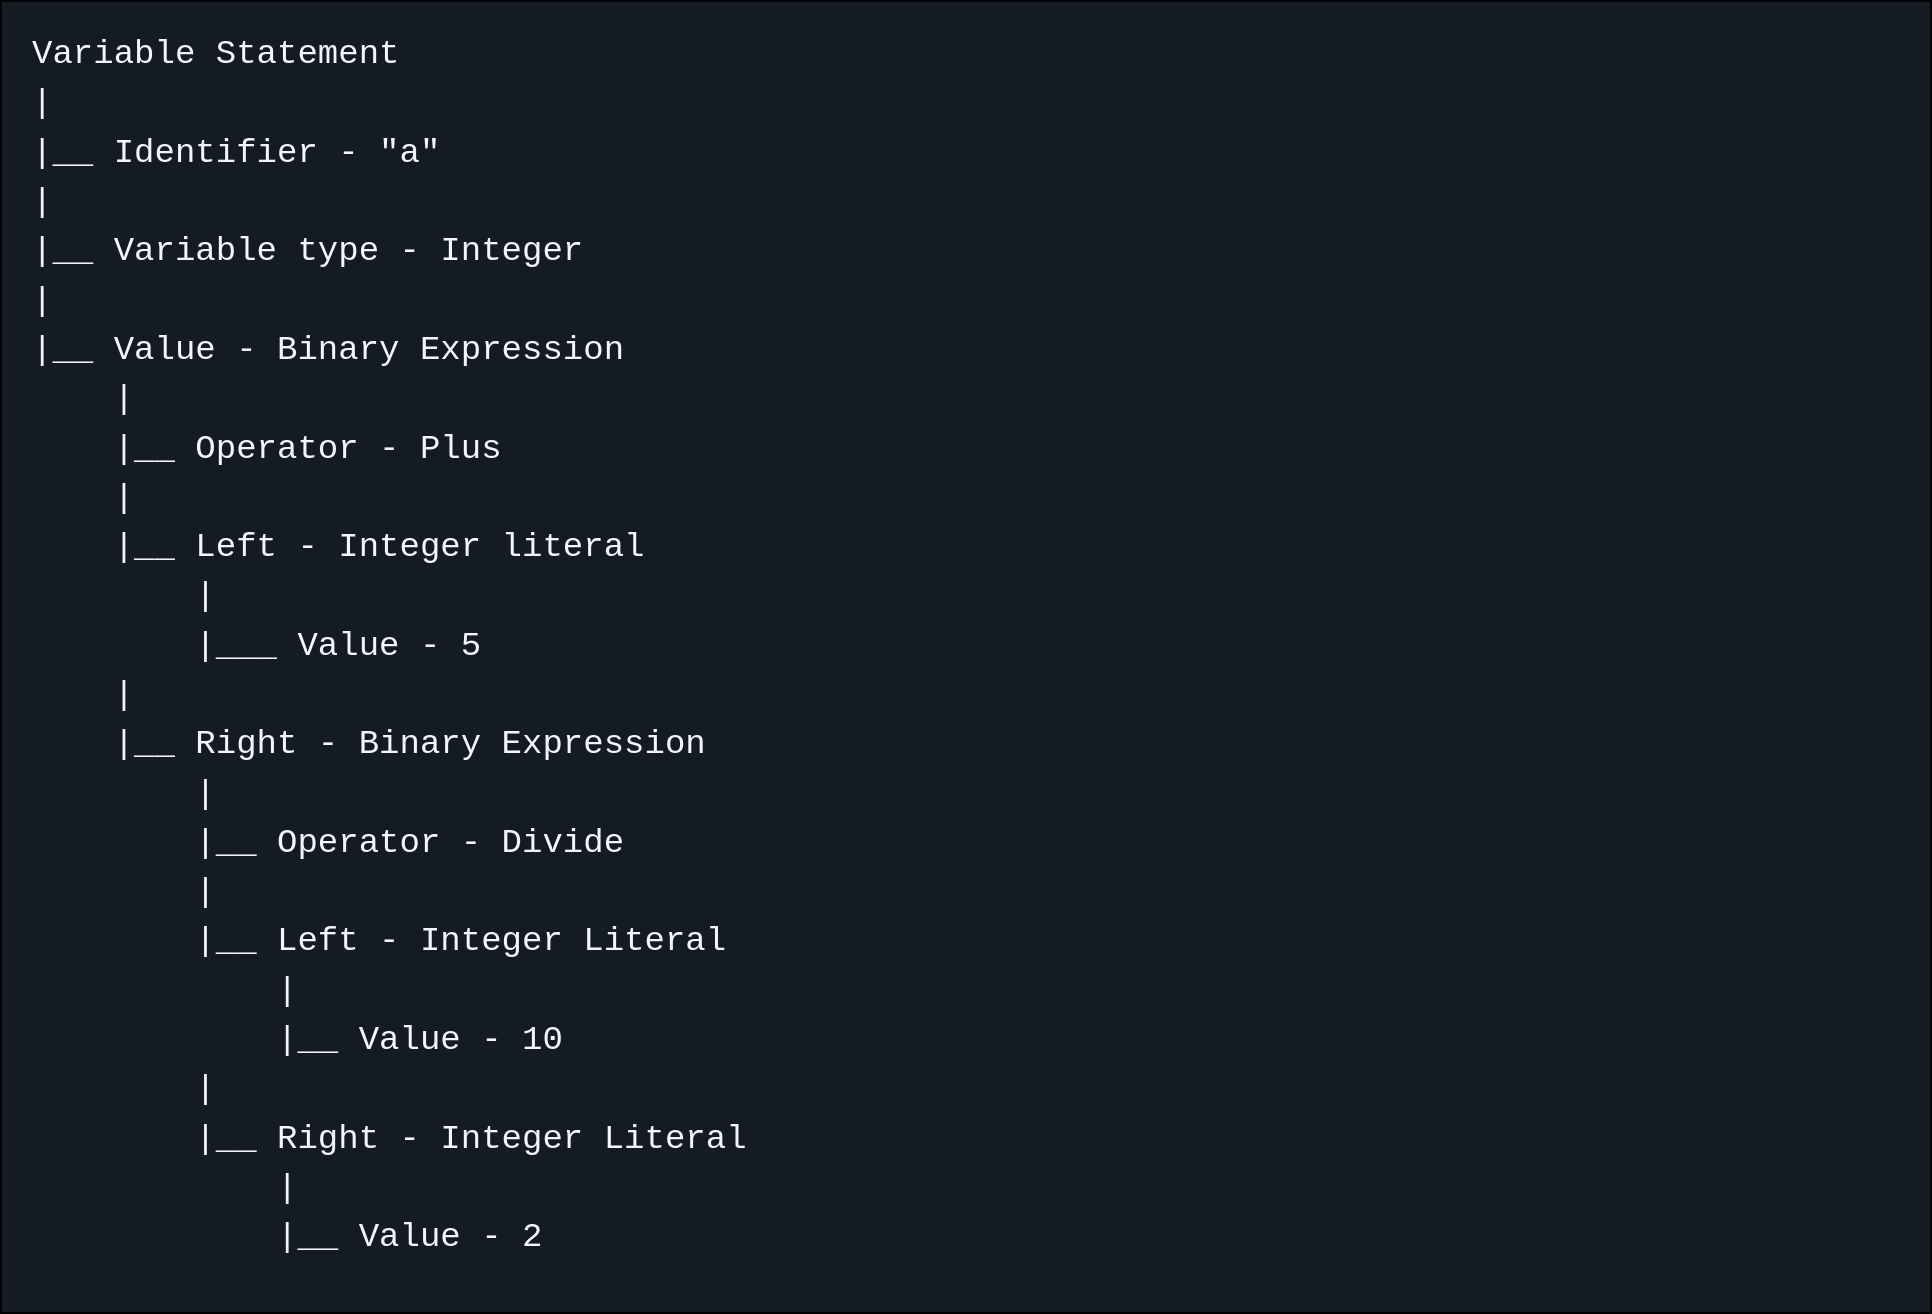
}Once the constructAST function is done running it should create a tree like the one below for the following statement, let a of type integer be 5 plus 10 divide 2 stop:
Variable Statement
|
|__ Identifier - "a"
|
|__ Variable type - Integer
|
|__ Value - Binary Expression
    |
    |__ Operator - Plus
    |
    |__ Left - Integer literal
        |
        |___ Value - 5
    |
    |__ Right - Binary Expression
        |
        |__ Operator - Divide
        |
        |__ Left - Integer Literal
            |
            |__ Value - 10
        |
        |__ Right - Integer Literal
            |
            |__ Value - 2
You can see how this tree represents how the code is structure in a fairly recursive format as there’s binary expressions inside binary expressions.
Code Generation
Once the constructAST function is done running it returns a pointer to the Root node shown below:
struct Root final : ASTNode {
  std::vector<std::shared_ptr<ASTNode>> nodes;

  std::string generateCode() override;
};
All this node has is an array of other nodes, so all we have to do is simply loop through all of them and call generateCode . It doesn’t matter whether some specific node is a variable, function, if statement, etc, they are all derived from the abstract class ASTNode and thus have a method of generateCode (OOP is so cool 😀).
The core of the code for the code generation is shown below:
for (Root *pointer = rootNode.get(); const auto &node : pointer->nodes) {
  if (FunctionStatement *functionStatement = dynamic_cast<FunctionStatement *>(node.get()))
    functionCode += node->generateCode();
  else
    currentCode += node->generateCode();
}
The reason I check for a function statement separately is because it has to be appended to a separate string since all the functions the user has been defined can’t put inside the main function in a C++ program.
Once the code is generated all that’s left is to write to a compiled.cpp file and boom the program is compiled!
Conclusion
Just like that, I can now compile my own programming language!
Now one thing to note is that I didn’t create methods like peek or consume to process tokens while constructing the AST. Typically, these are used to just look ahead by one index, or take the value of the next token and increment the index. However, I chose to just use raw indexes with arrays due to how I was processing the individual statements, but this isn’t really the standard way of doing it.
Other than that, if you have any questions, feedback, or other thoughts then please feel free to contact me!